Lane Identity
Use Blade Fury to dodge dangerous spells, secure kills with support disables, or escape when the offlane commits. Do not waste it for small harass if the enemy can punish the cooldown.
Juggernaut is a stable safe-lane carry who can farm through pressure, join early tower fights, and punish isolated heroes with Omnislash. The key is choosing when to fight with Blade Fury and when to protect your scaling with disciplined map movement.
View Item Builds Back to Hero GuidesJuggernaut is strong because he can turn defensive spells into aggressive objectives.
Use Blade Fury to dodge dangerous spells, secure kills with support disables, or escape when the offlane commits. Do not waste it for small harass if the enemy can punish the cooldown.
Join fights when Healing Ward can keep multiple heroes alive near towers. If your team cannot group, farm the safest lane and nearby camps until your next item timing.
Look for isolated targets before using Omnislash. In late fights, bad target selection matters more than raw damage.
Juggernaut's spells are simple, but the timing is not. Every spell should protect a timing or secure an objective.

Your early kill and escape spell. Use it with support slows, to dodge disables, or to TP out when enemies lack immunity-piercing control.
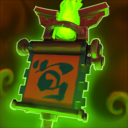
The spell that turns a skirmish into a tower. Keep it behind your team and move it carefully instead of dropping it in front of enemy attacks.

Your farming and scaling passive. It becomes stronger when you can keep hitting safely with attack speed and positioning.

Use it on isolated heroes or after creeps are cleared. Casting into a full wave often wastes the spell.
Buy for the game you are playing: farm speed when safe, dispel when controlled, damage when your team can protect you.

Good for lane trading, armor, and chasing during Blade Fury.

Choose it when the game allows farming and you need to scale into later timings.

Buy for dispel, split pressure, and safer damage output against silences or roots.

Late-game damage and evasion when enemies rely on physical hits and lack true strike.

Needed when Blade Fury cannot cover every disable or when fights last beyond one spell cycle.

Consider when you fight often and want stronger Blade Fury uptime or utility.
Healing Ward usage and Omnislash target selection — get these right and you jump a full medal tier.
Most Juggernaut players treat Healing Ward as a retreat tool. The best players use it as an aggressive sustain tool. Dropping a ward during a tower dive or between Roshan hits lets your team stay on the map 30 seconds longer than the enemy expects. The cooldown is 60 seconds — treat it as a resource to spend, not a panic button.
In a 5v5 fight, a Juggernaut who Omnislaughs the enemy carry does 800-1200 damage. A Juggernaut who uses it on the enemy backline supports deletes a hero worth 2000+ gold of net worth, removes a save or disable, and creates a 5v4 in seconds. Find the squishiest target with no escape. If that target is a core with BKB, wait three seconds until BKB ends, then press R.
The Juggernaut hero portrait, ability icons, and item icons are loaded from publicly accessible Valve, Dota 2, or Steam CDN asset endpoints where available. They are contextual references for this independent gameplay guide and are not offered as downloadable asset packs.